Installation/VMs
UTM
UTM can only be used on Apple Silicon Macs (M1, M2, M3 models). If you have a different machine, please use a different virtualization software.
Creating a VM
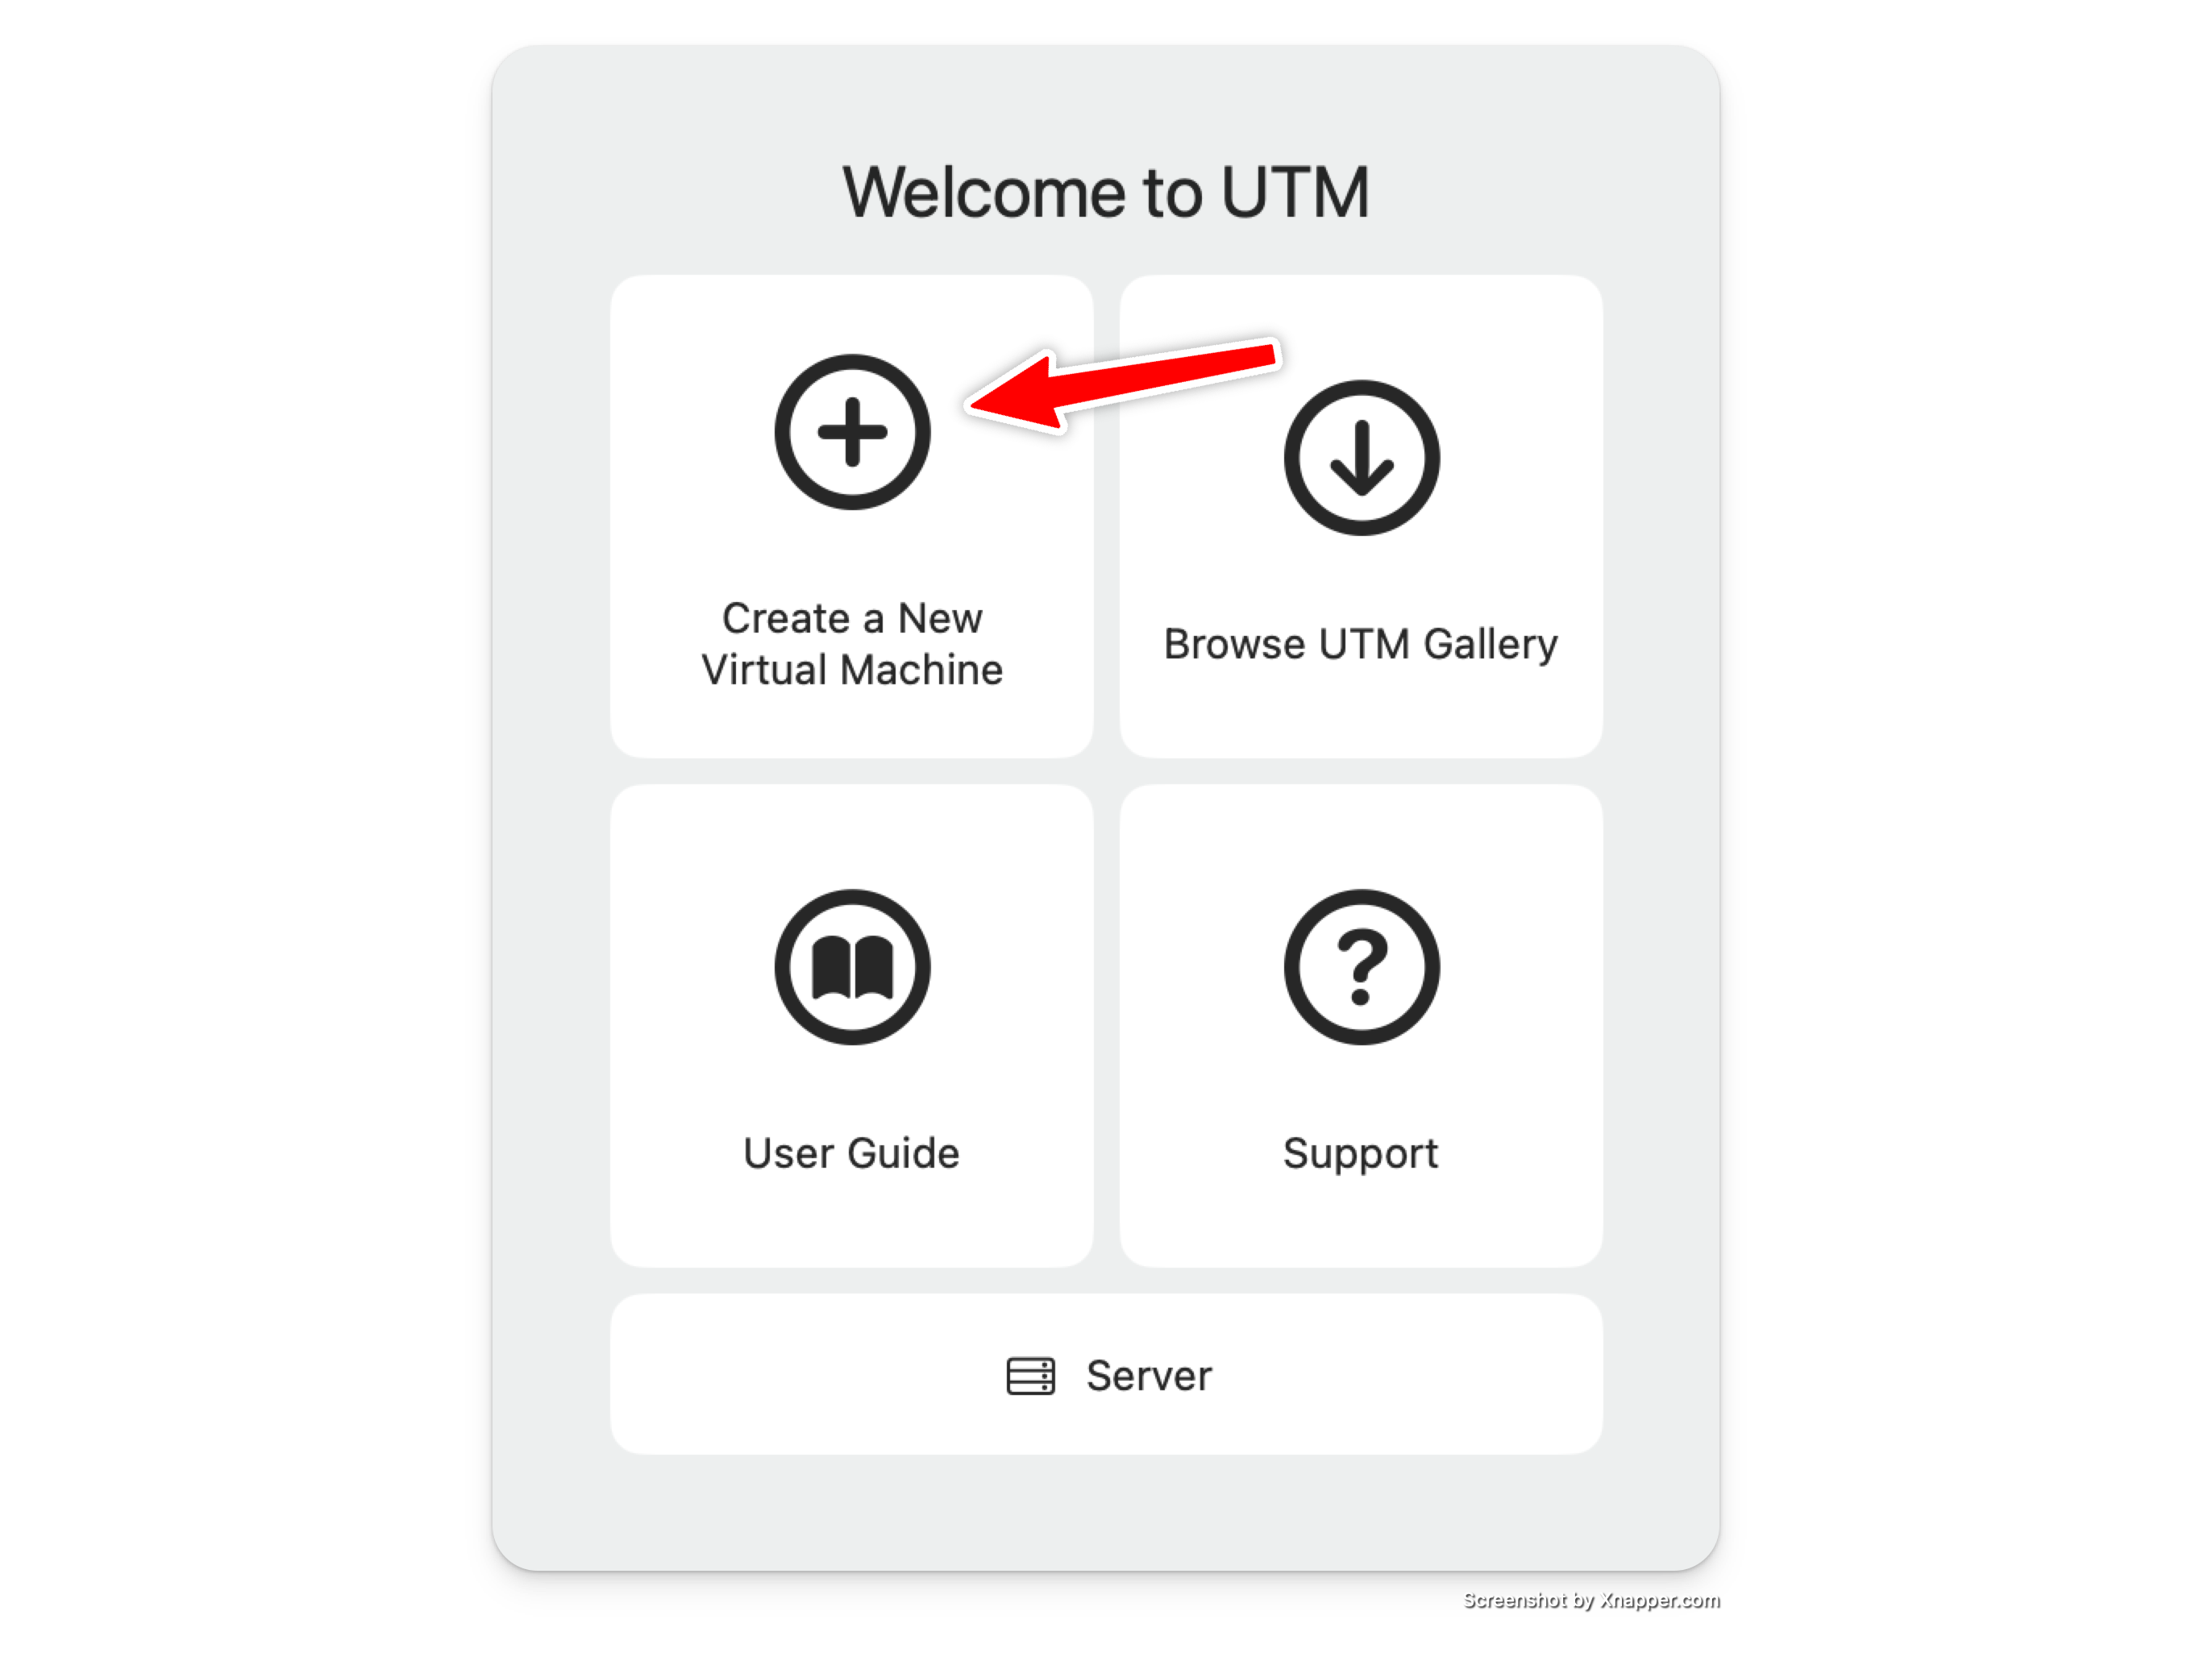
1) Create new Machine
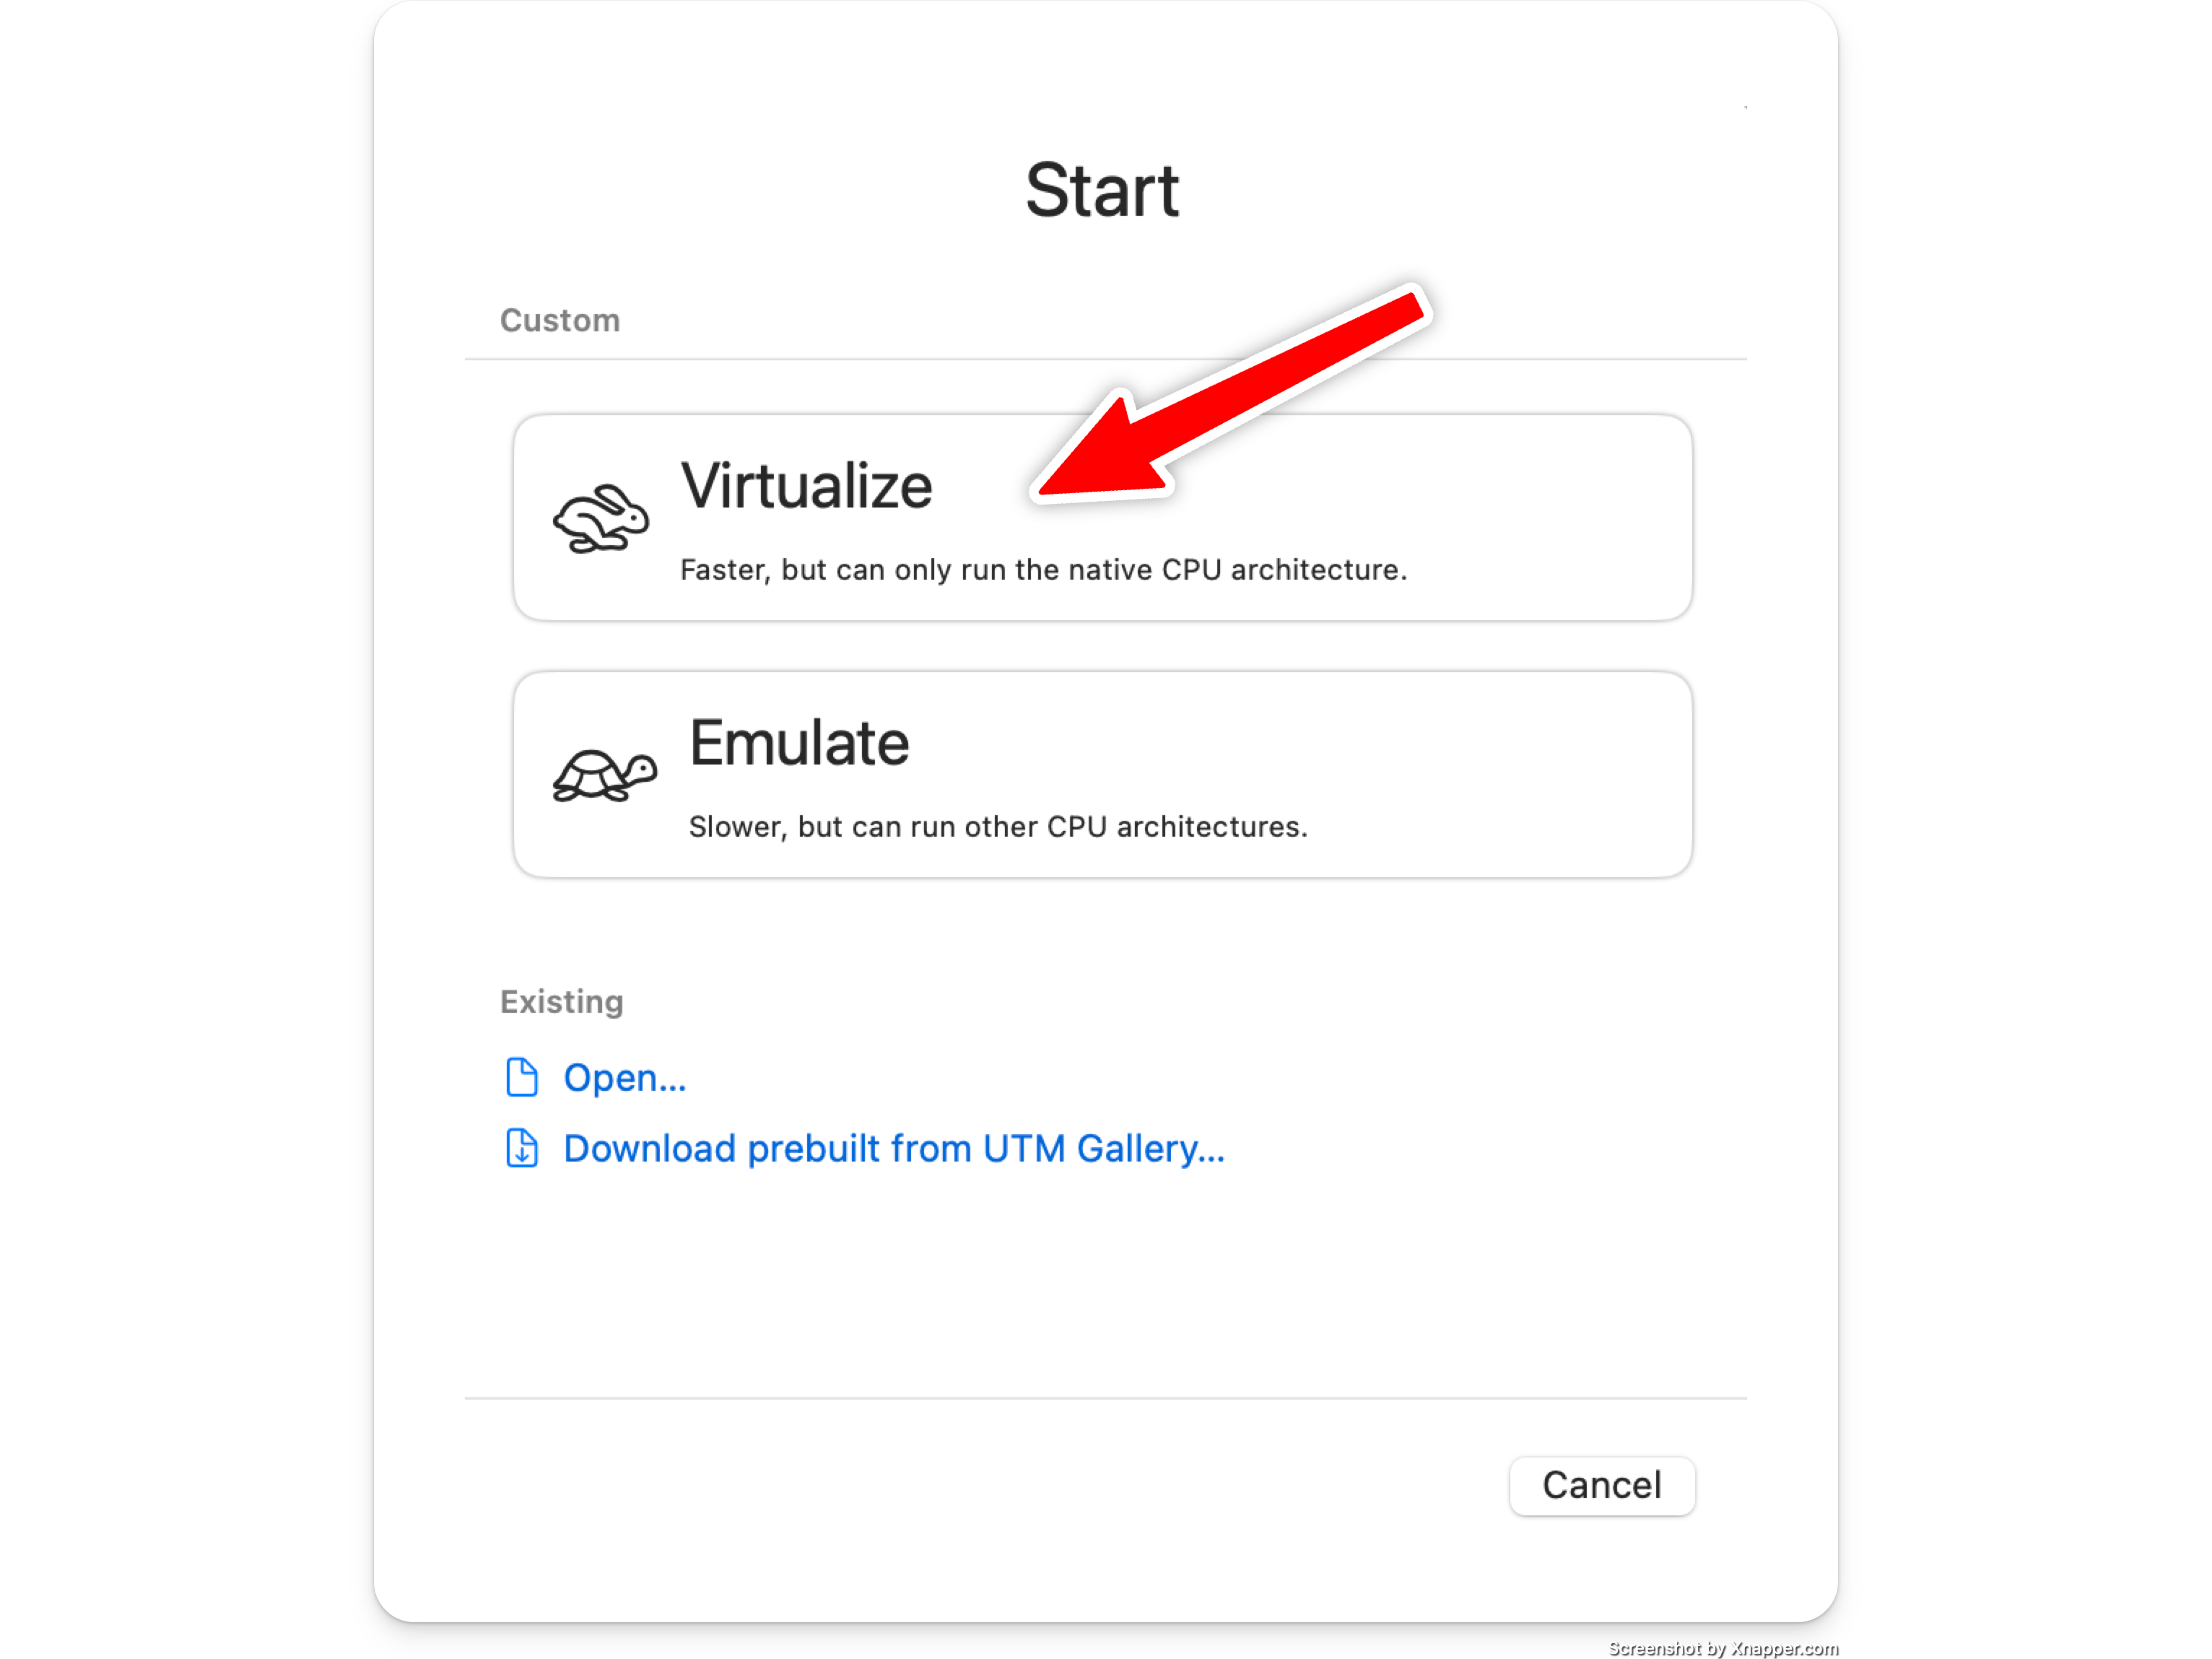
2) Select Virtualise
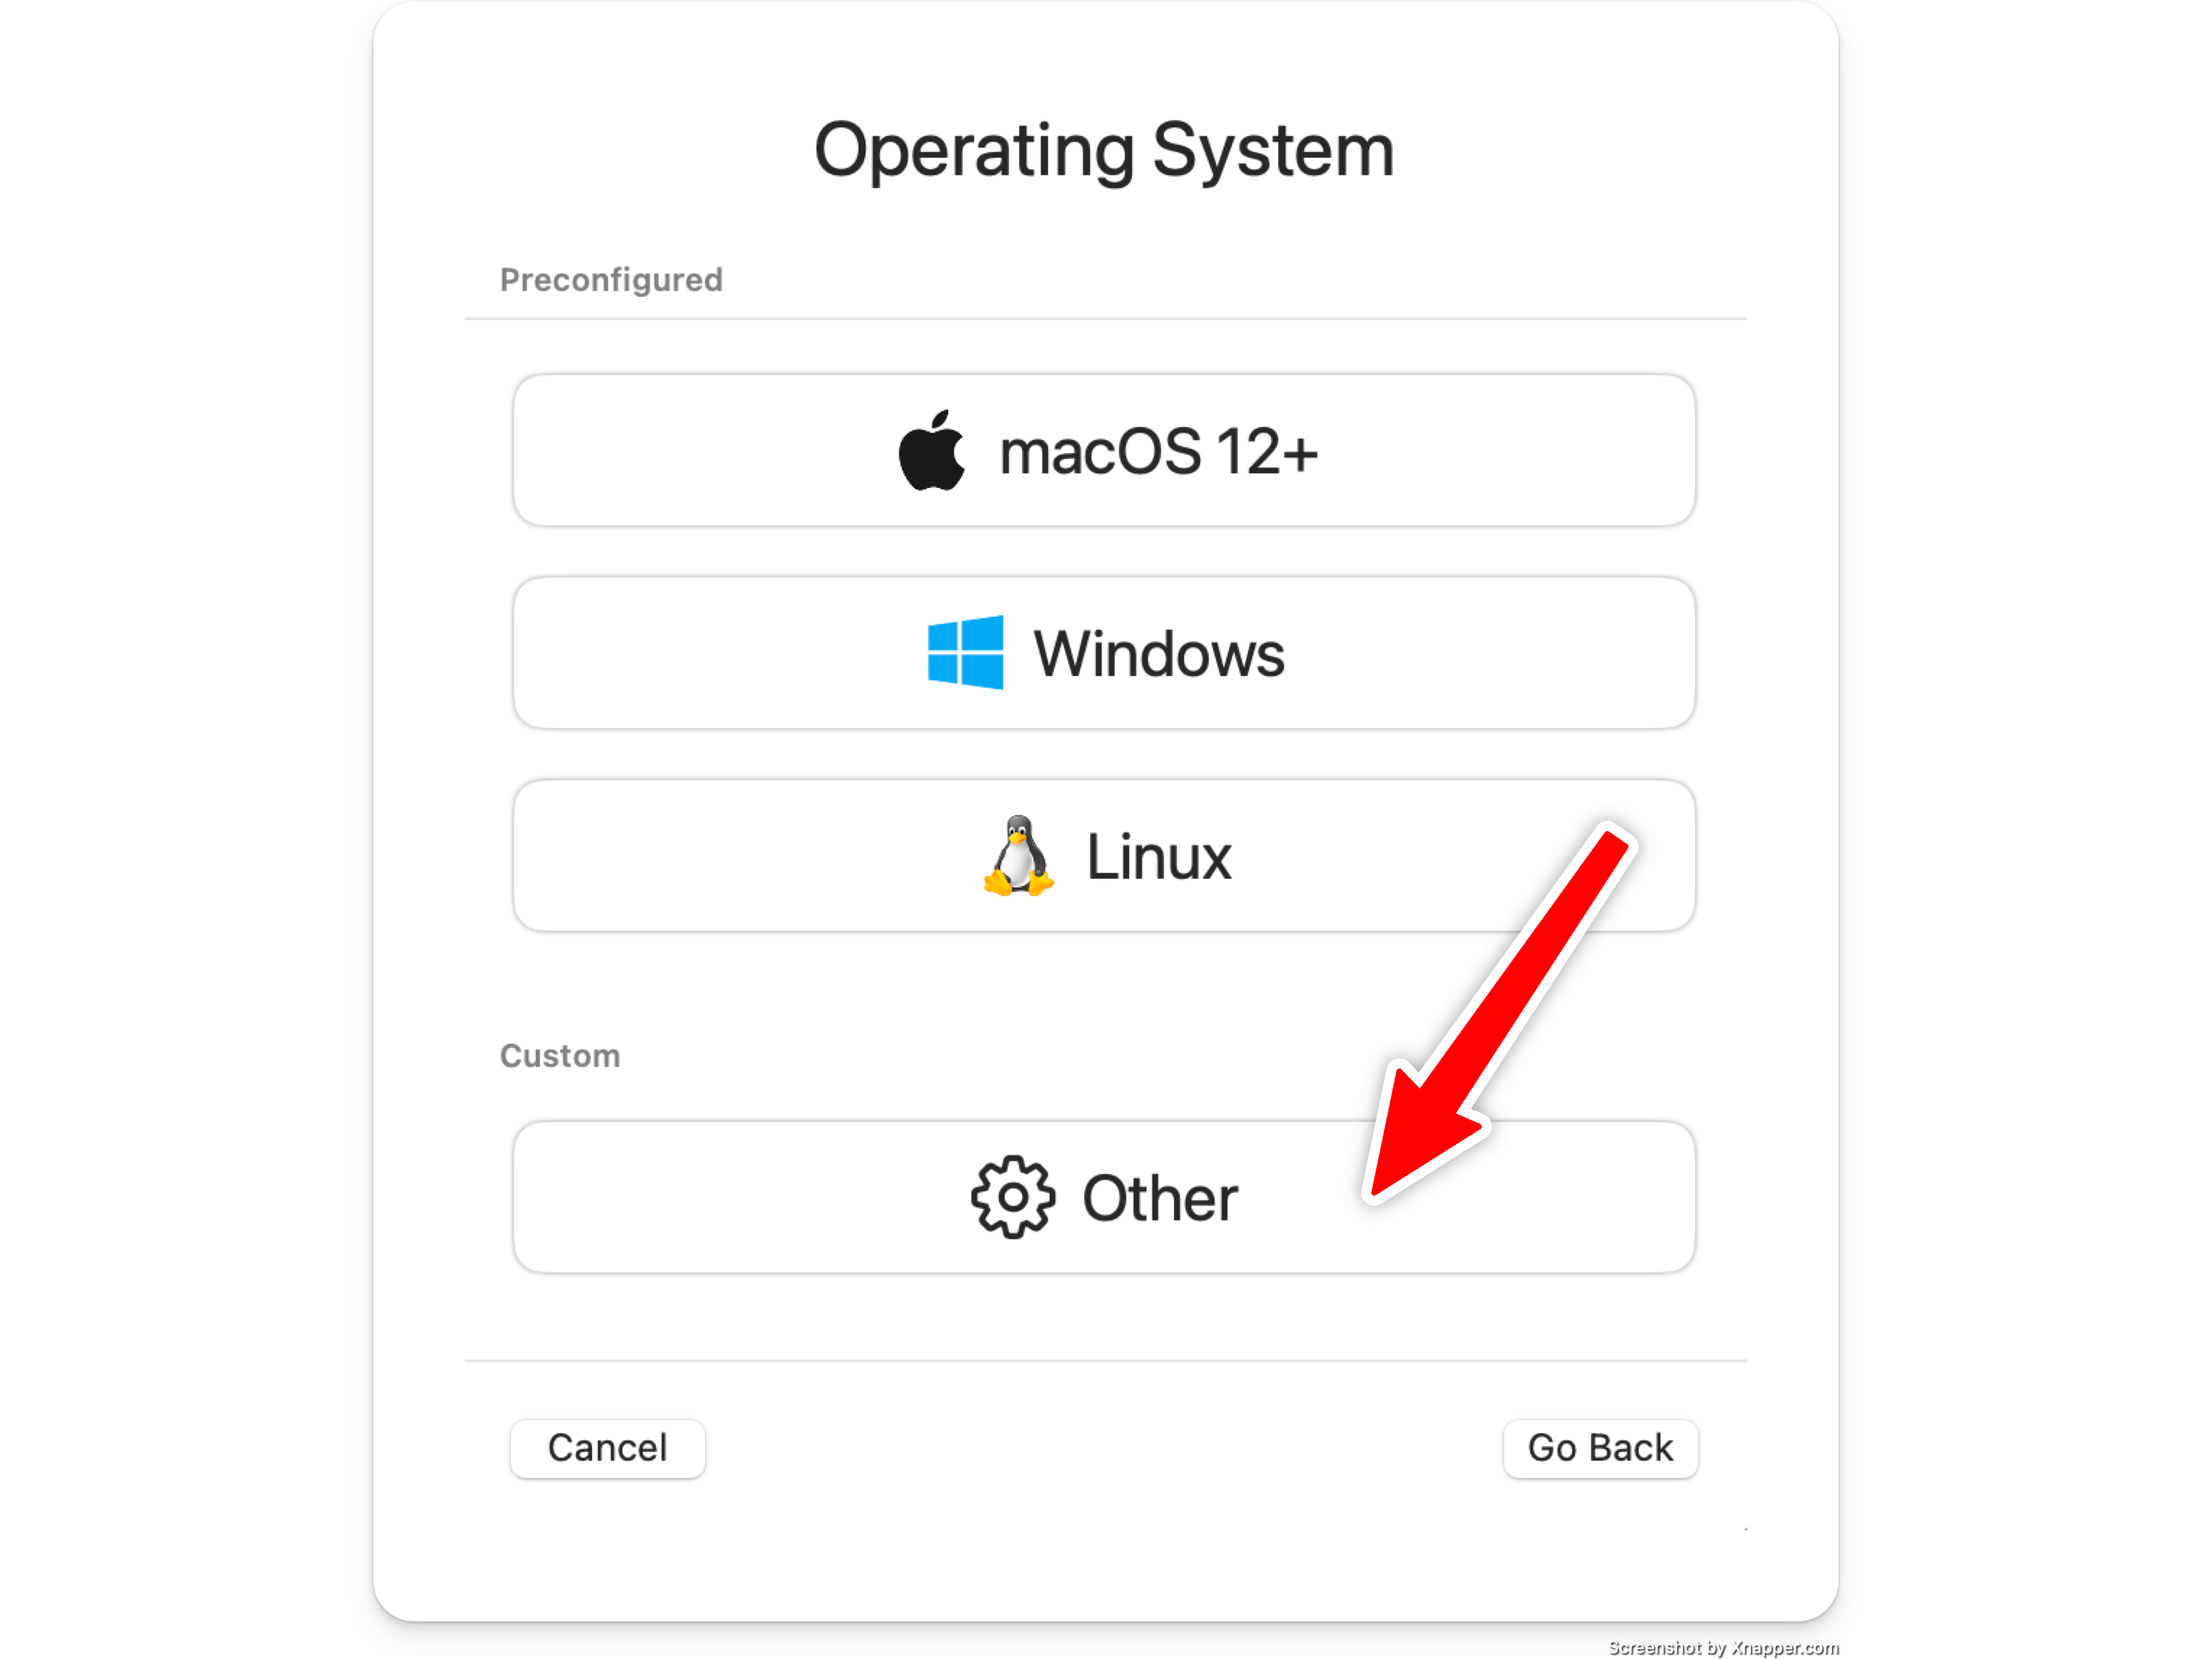
3) Select "Other" operating system
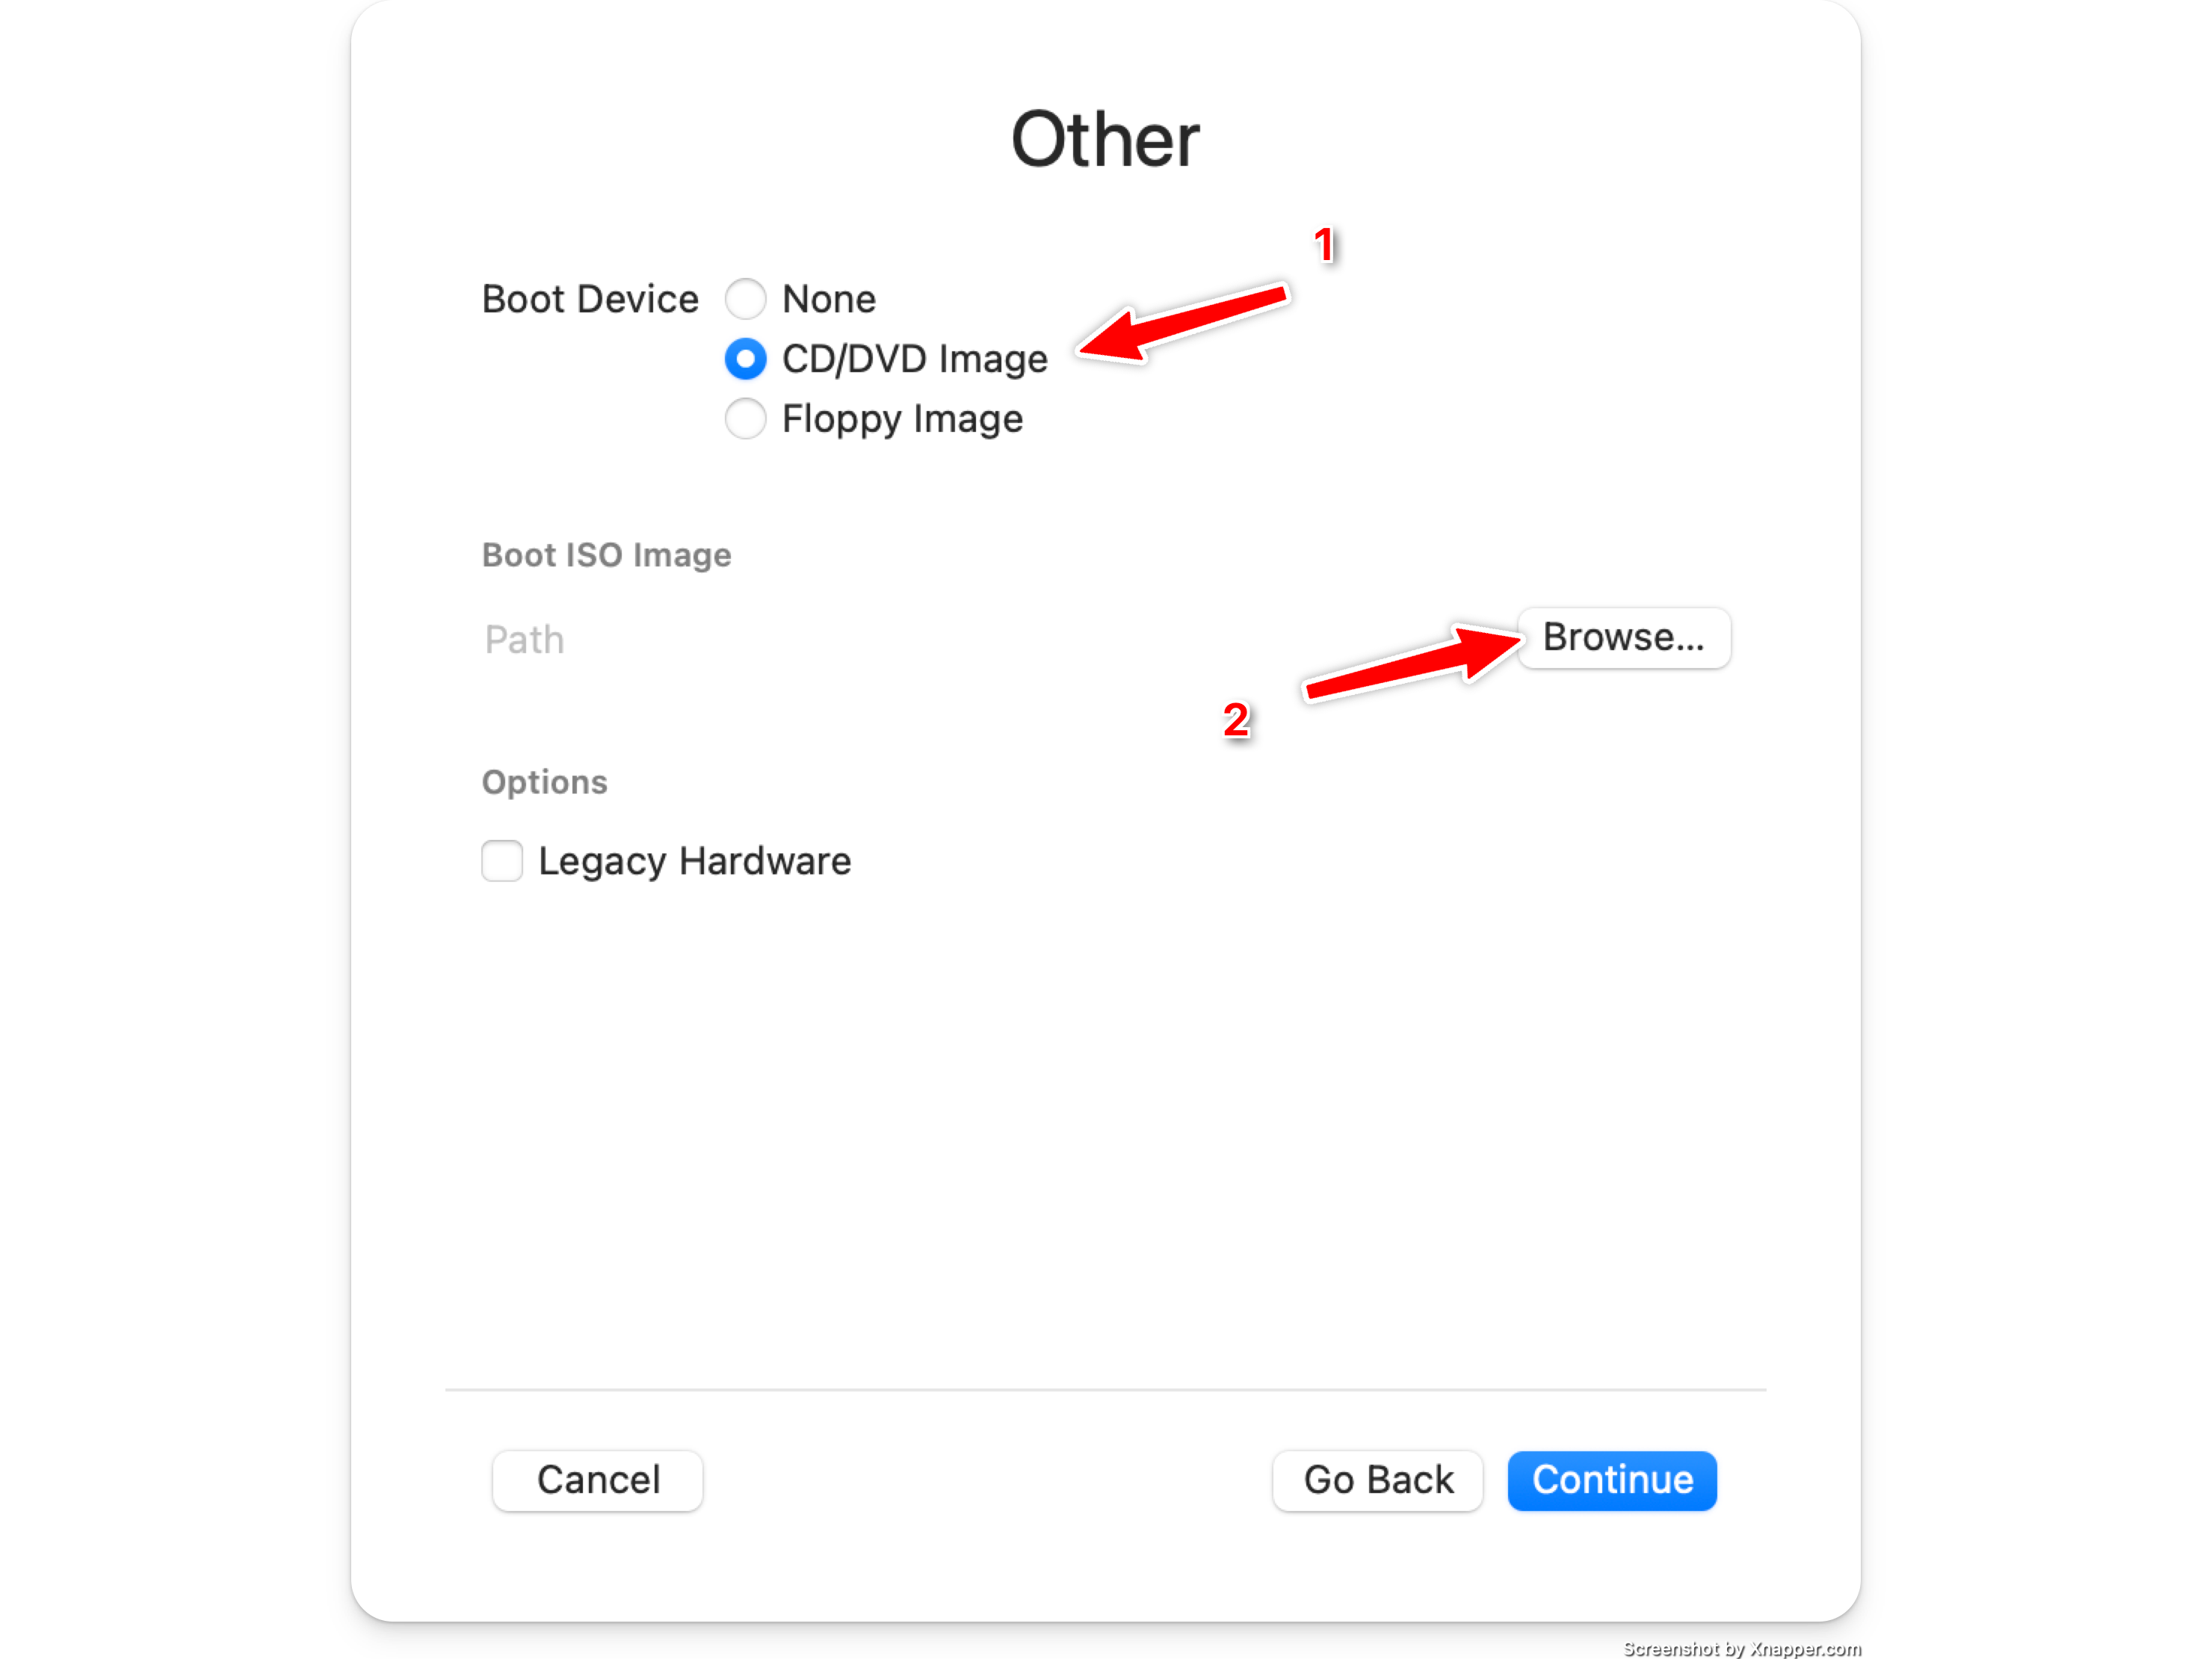
4) Select the downloaded aarch64 ISO file
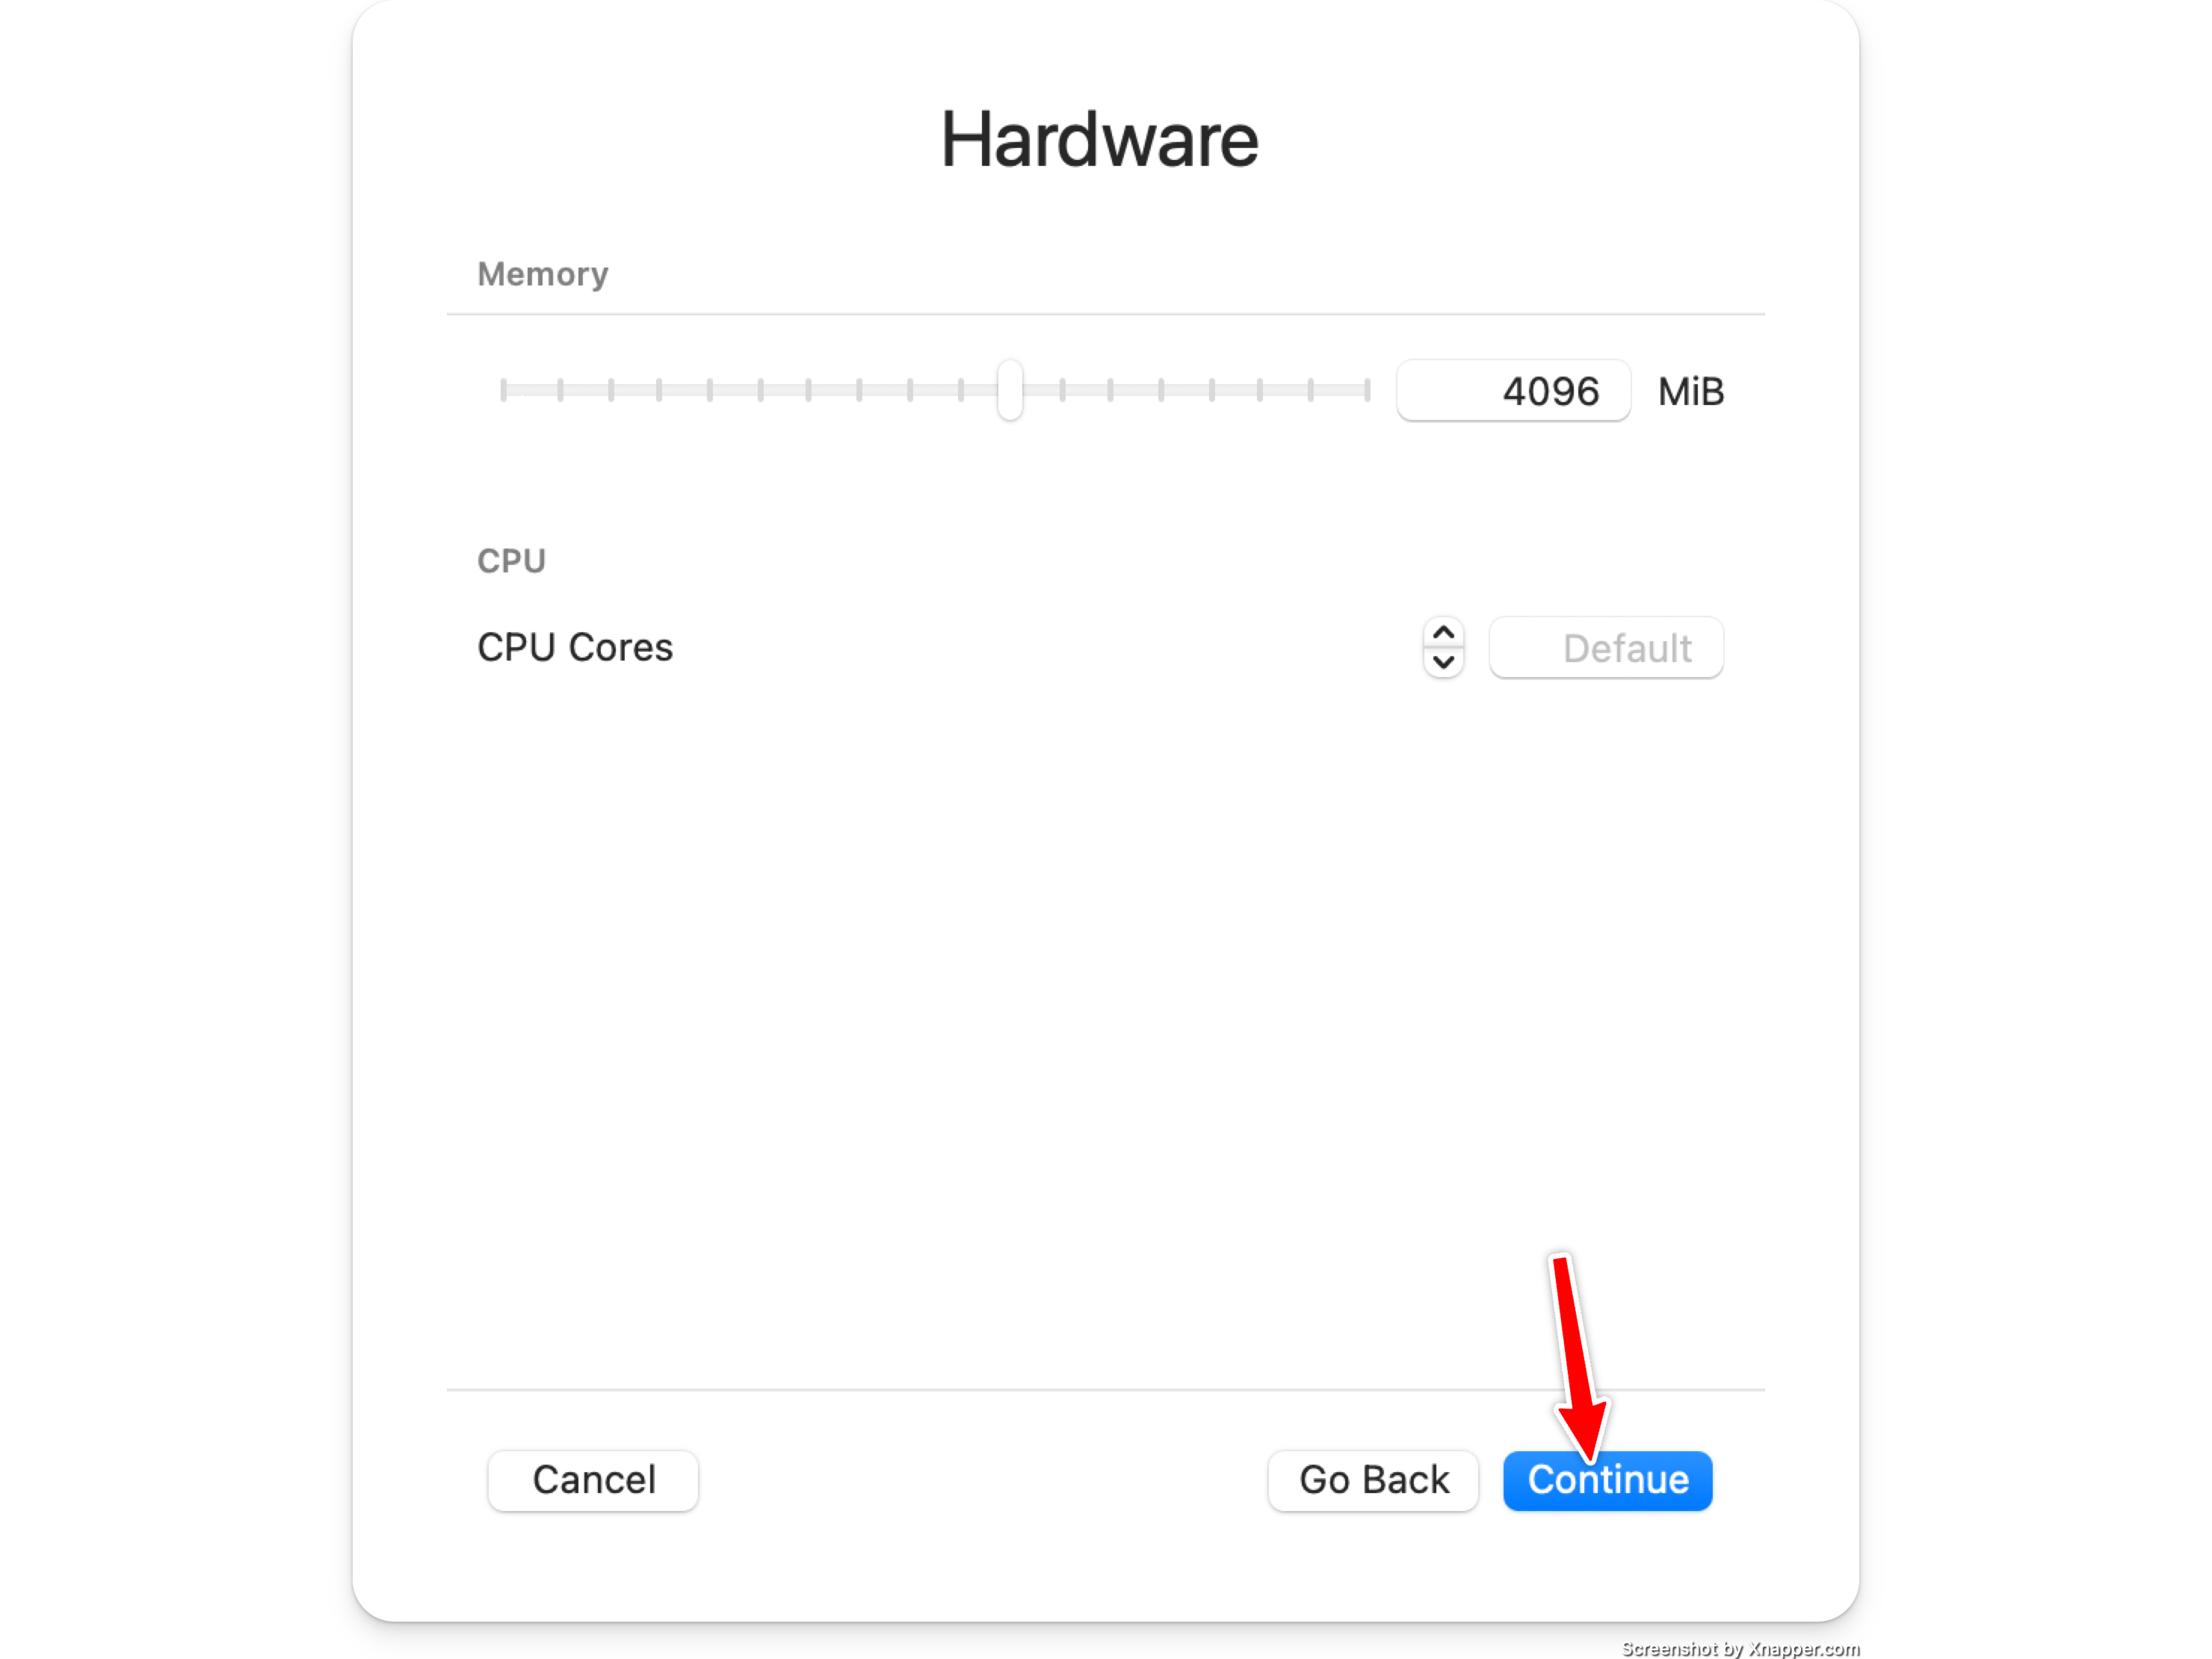
5) Set the amount of ram you want
The default of 4096mb is typically fine.
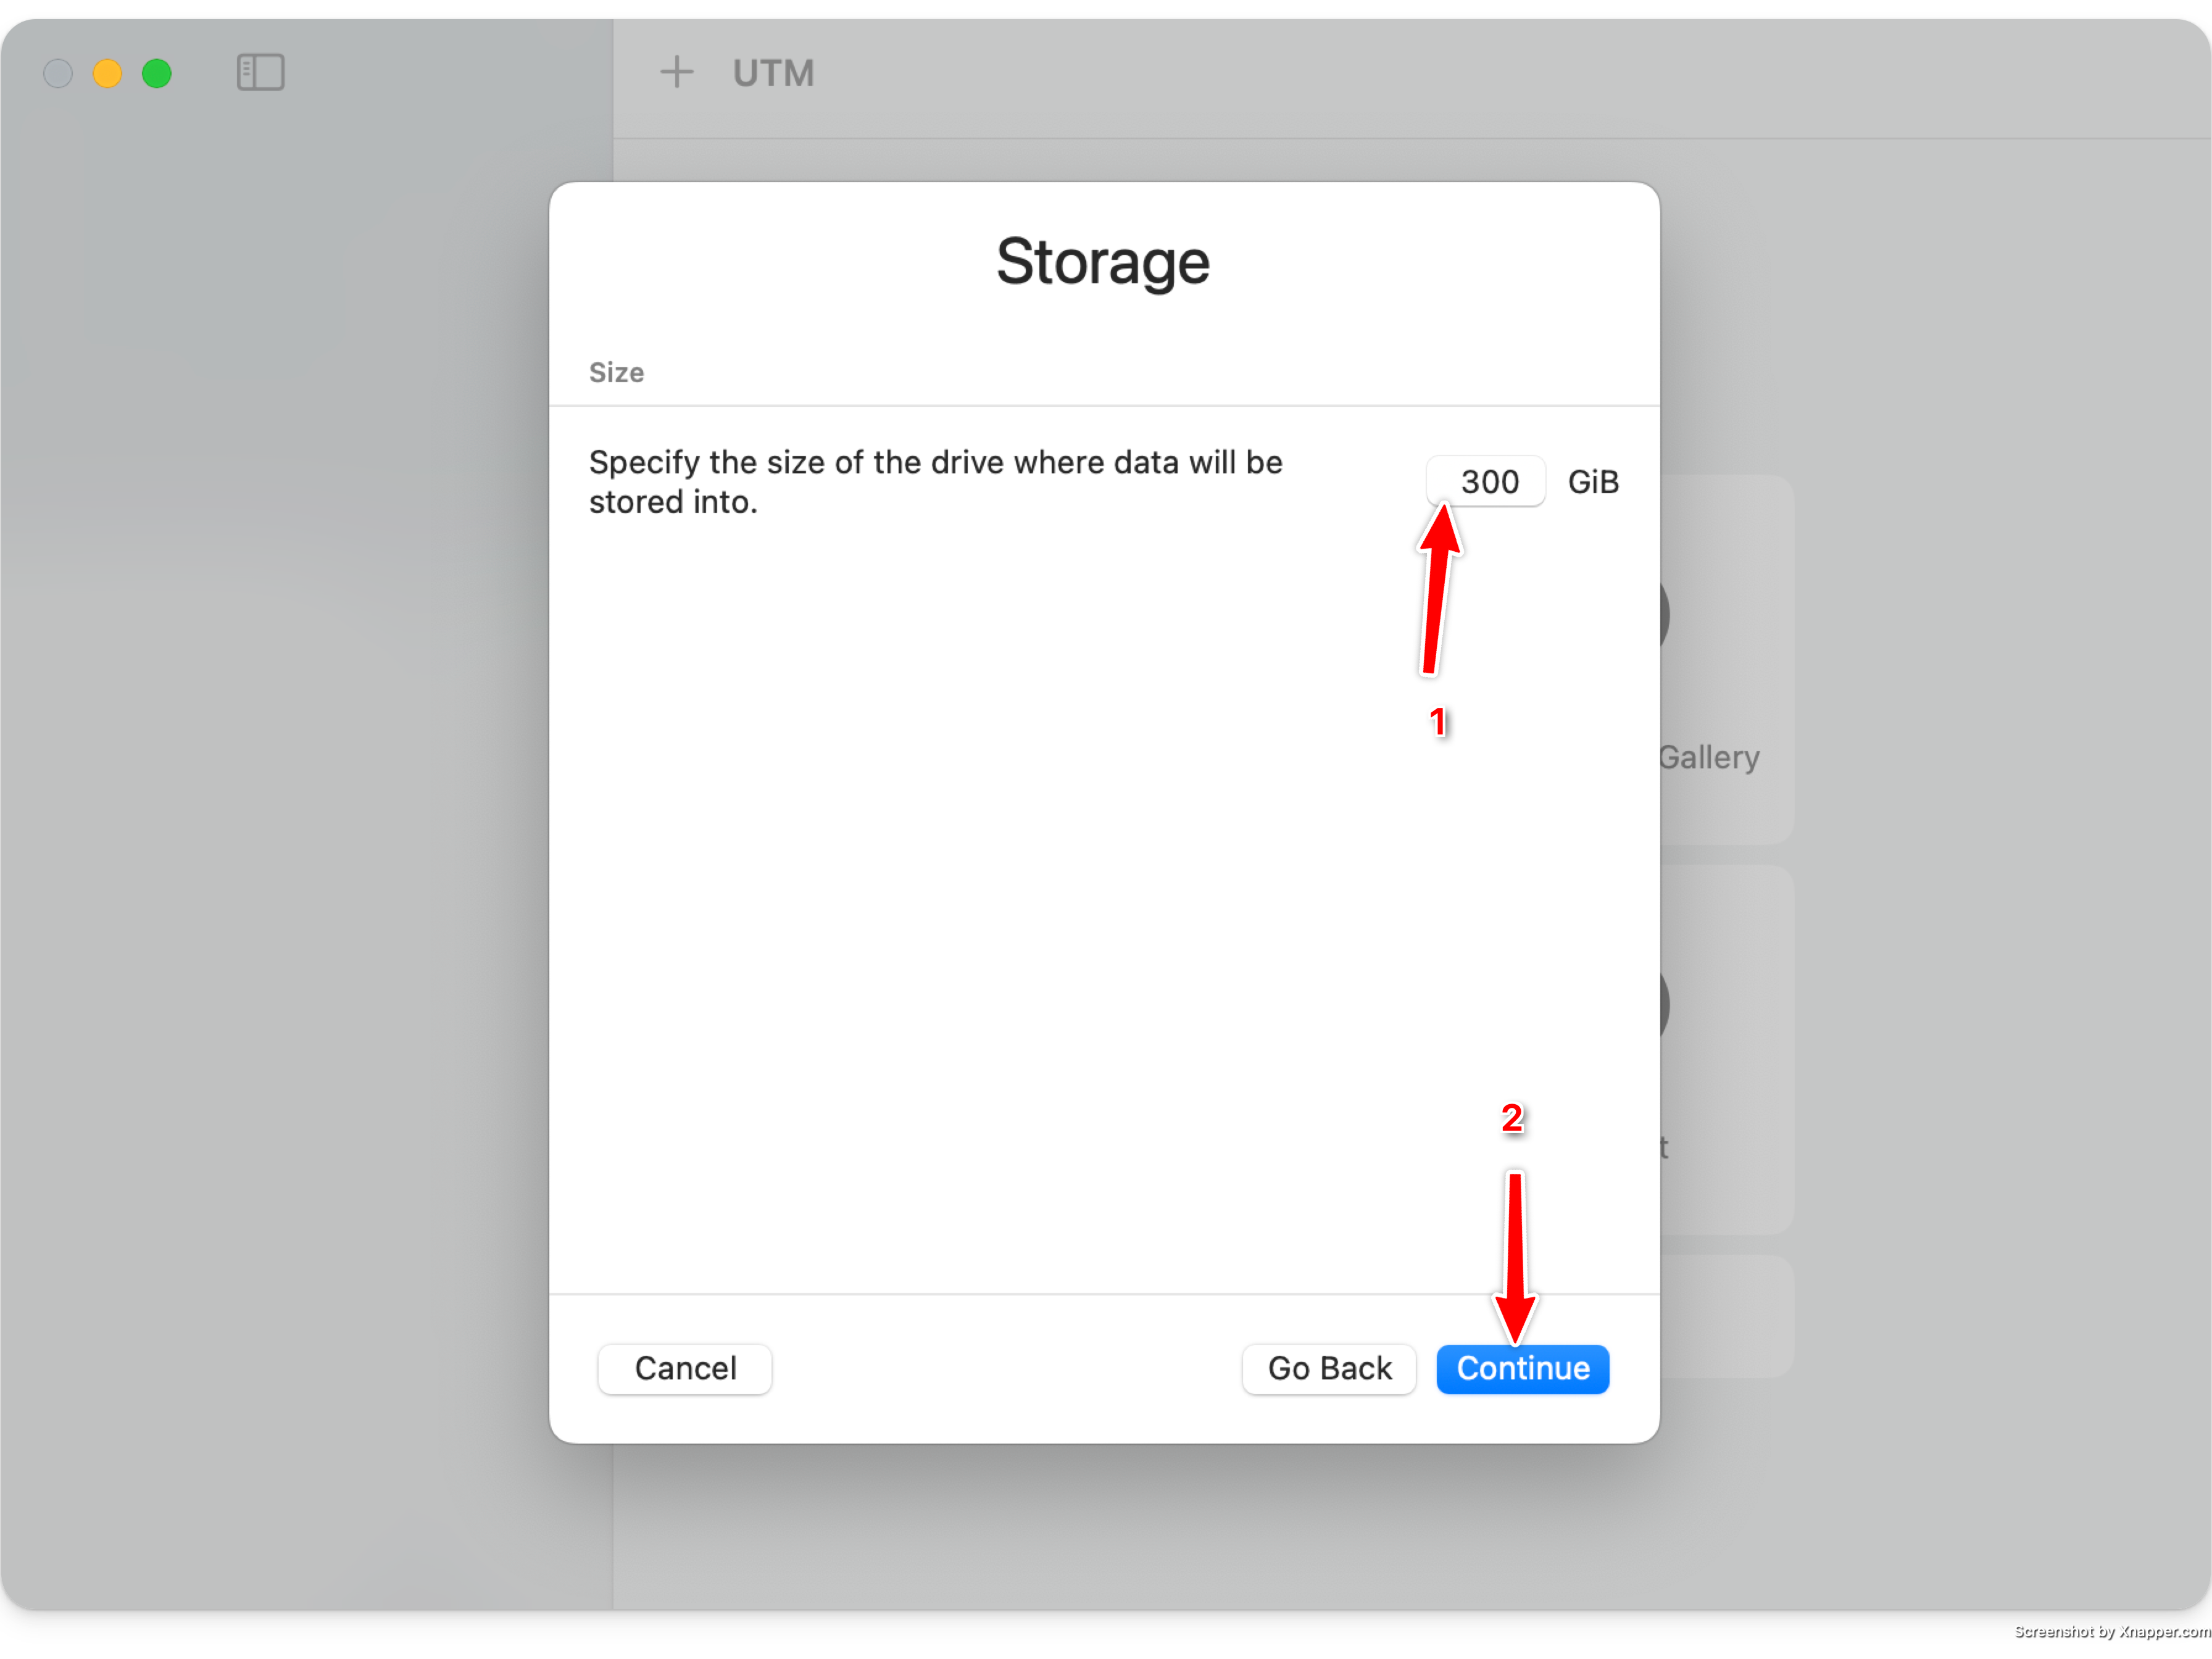
6) Set the amount of storage you want
UTM uses sparse disk files, so a 500gb disk will not actually take up 500gb on your hard drive.
If you wish to sync the blockchain in this VM image, ensure you set this to over 300gb.
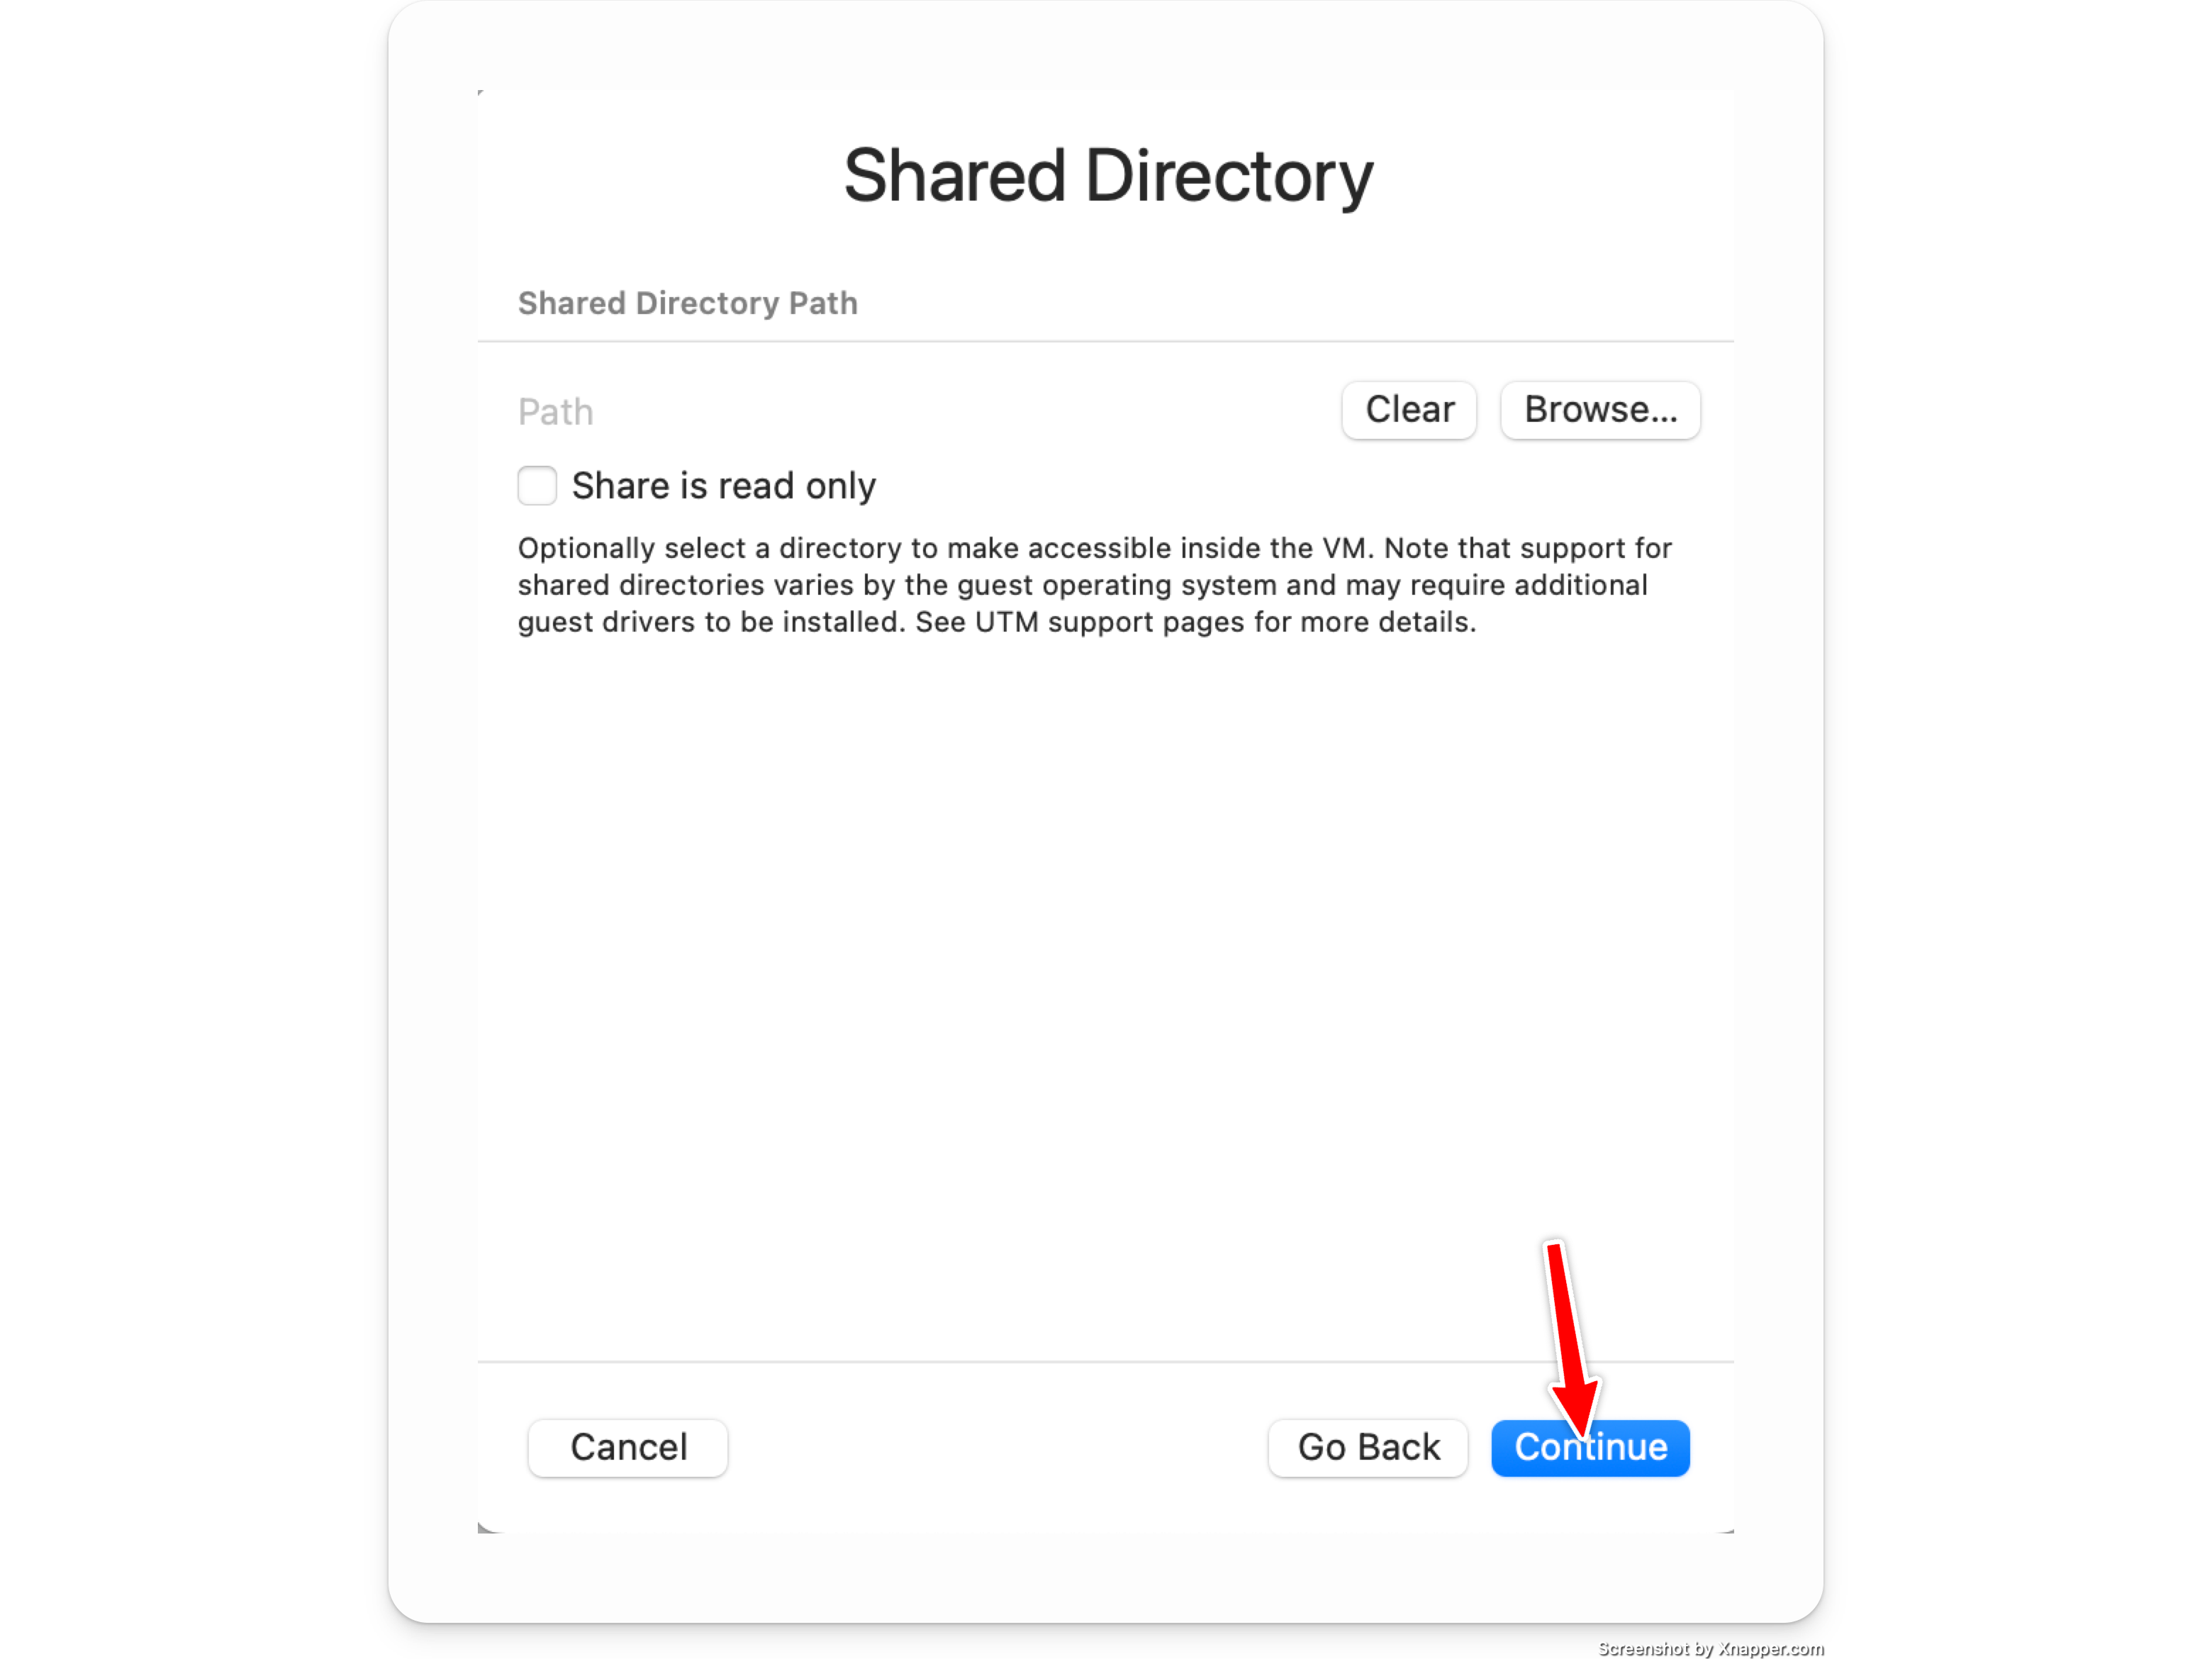
7) Skip any shared directory configuration
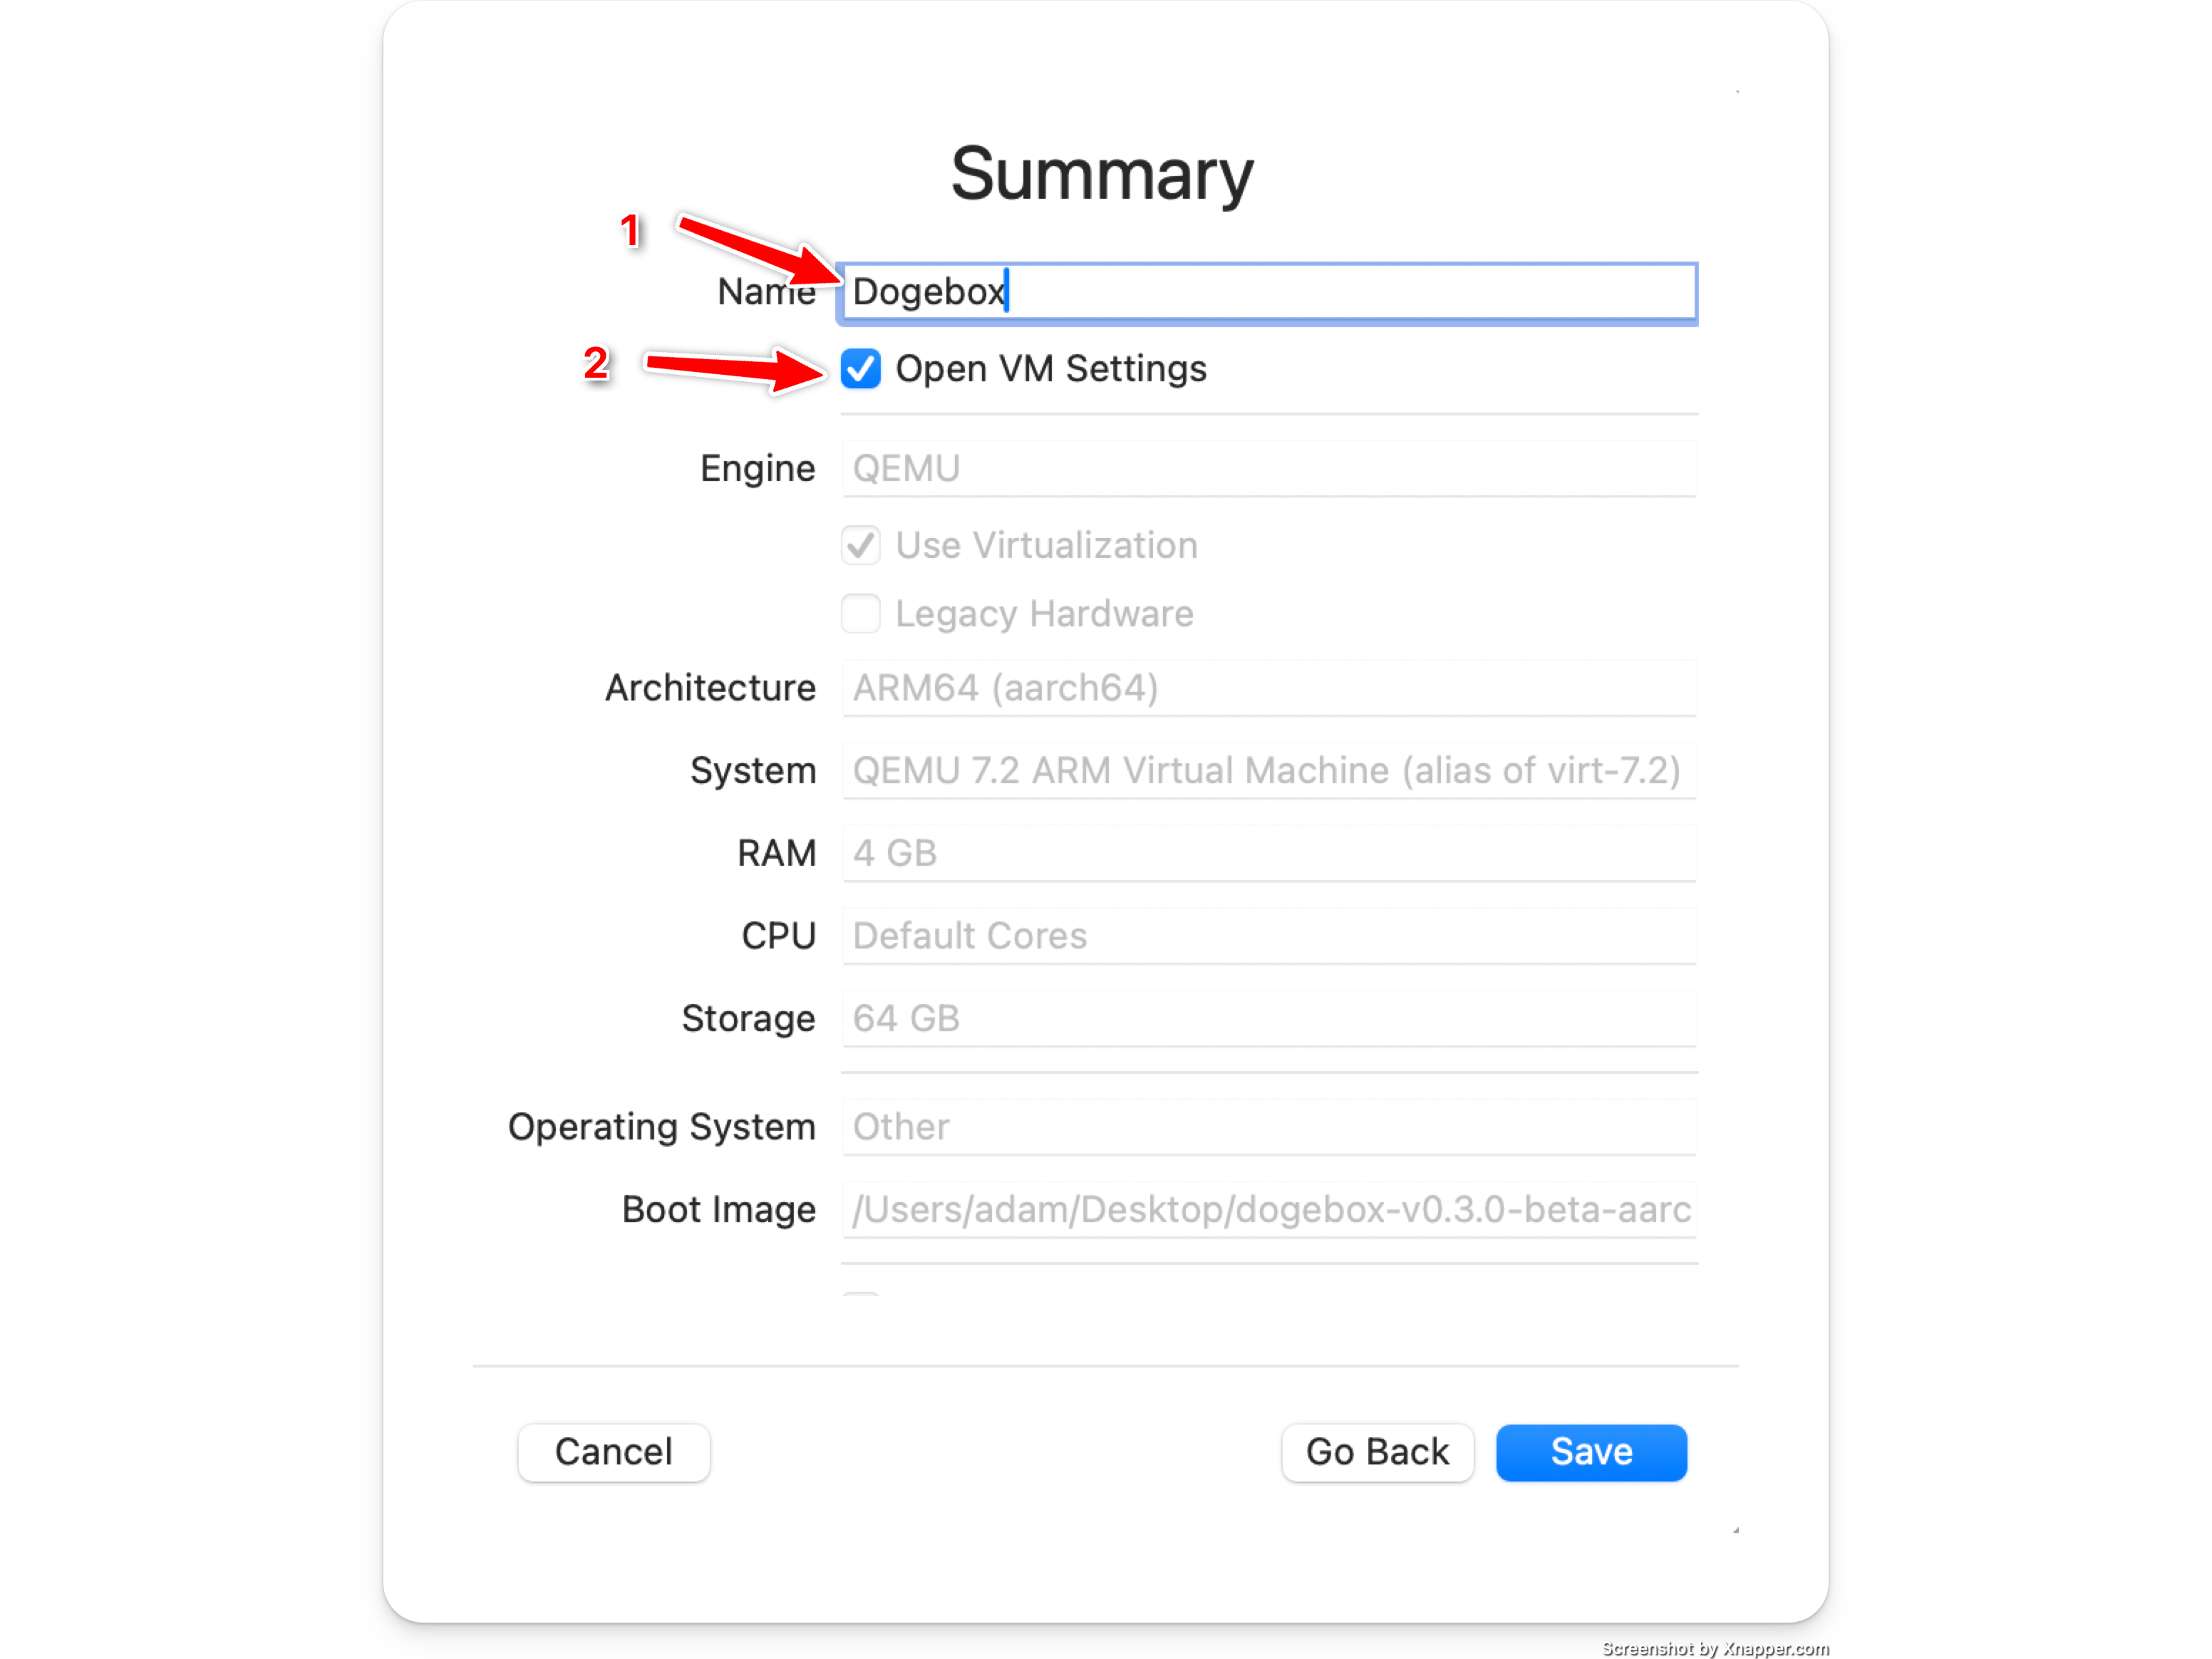
8) Name your VM image and open settings
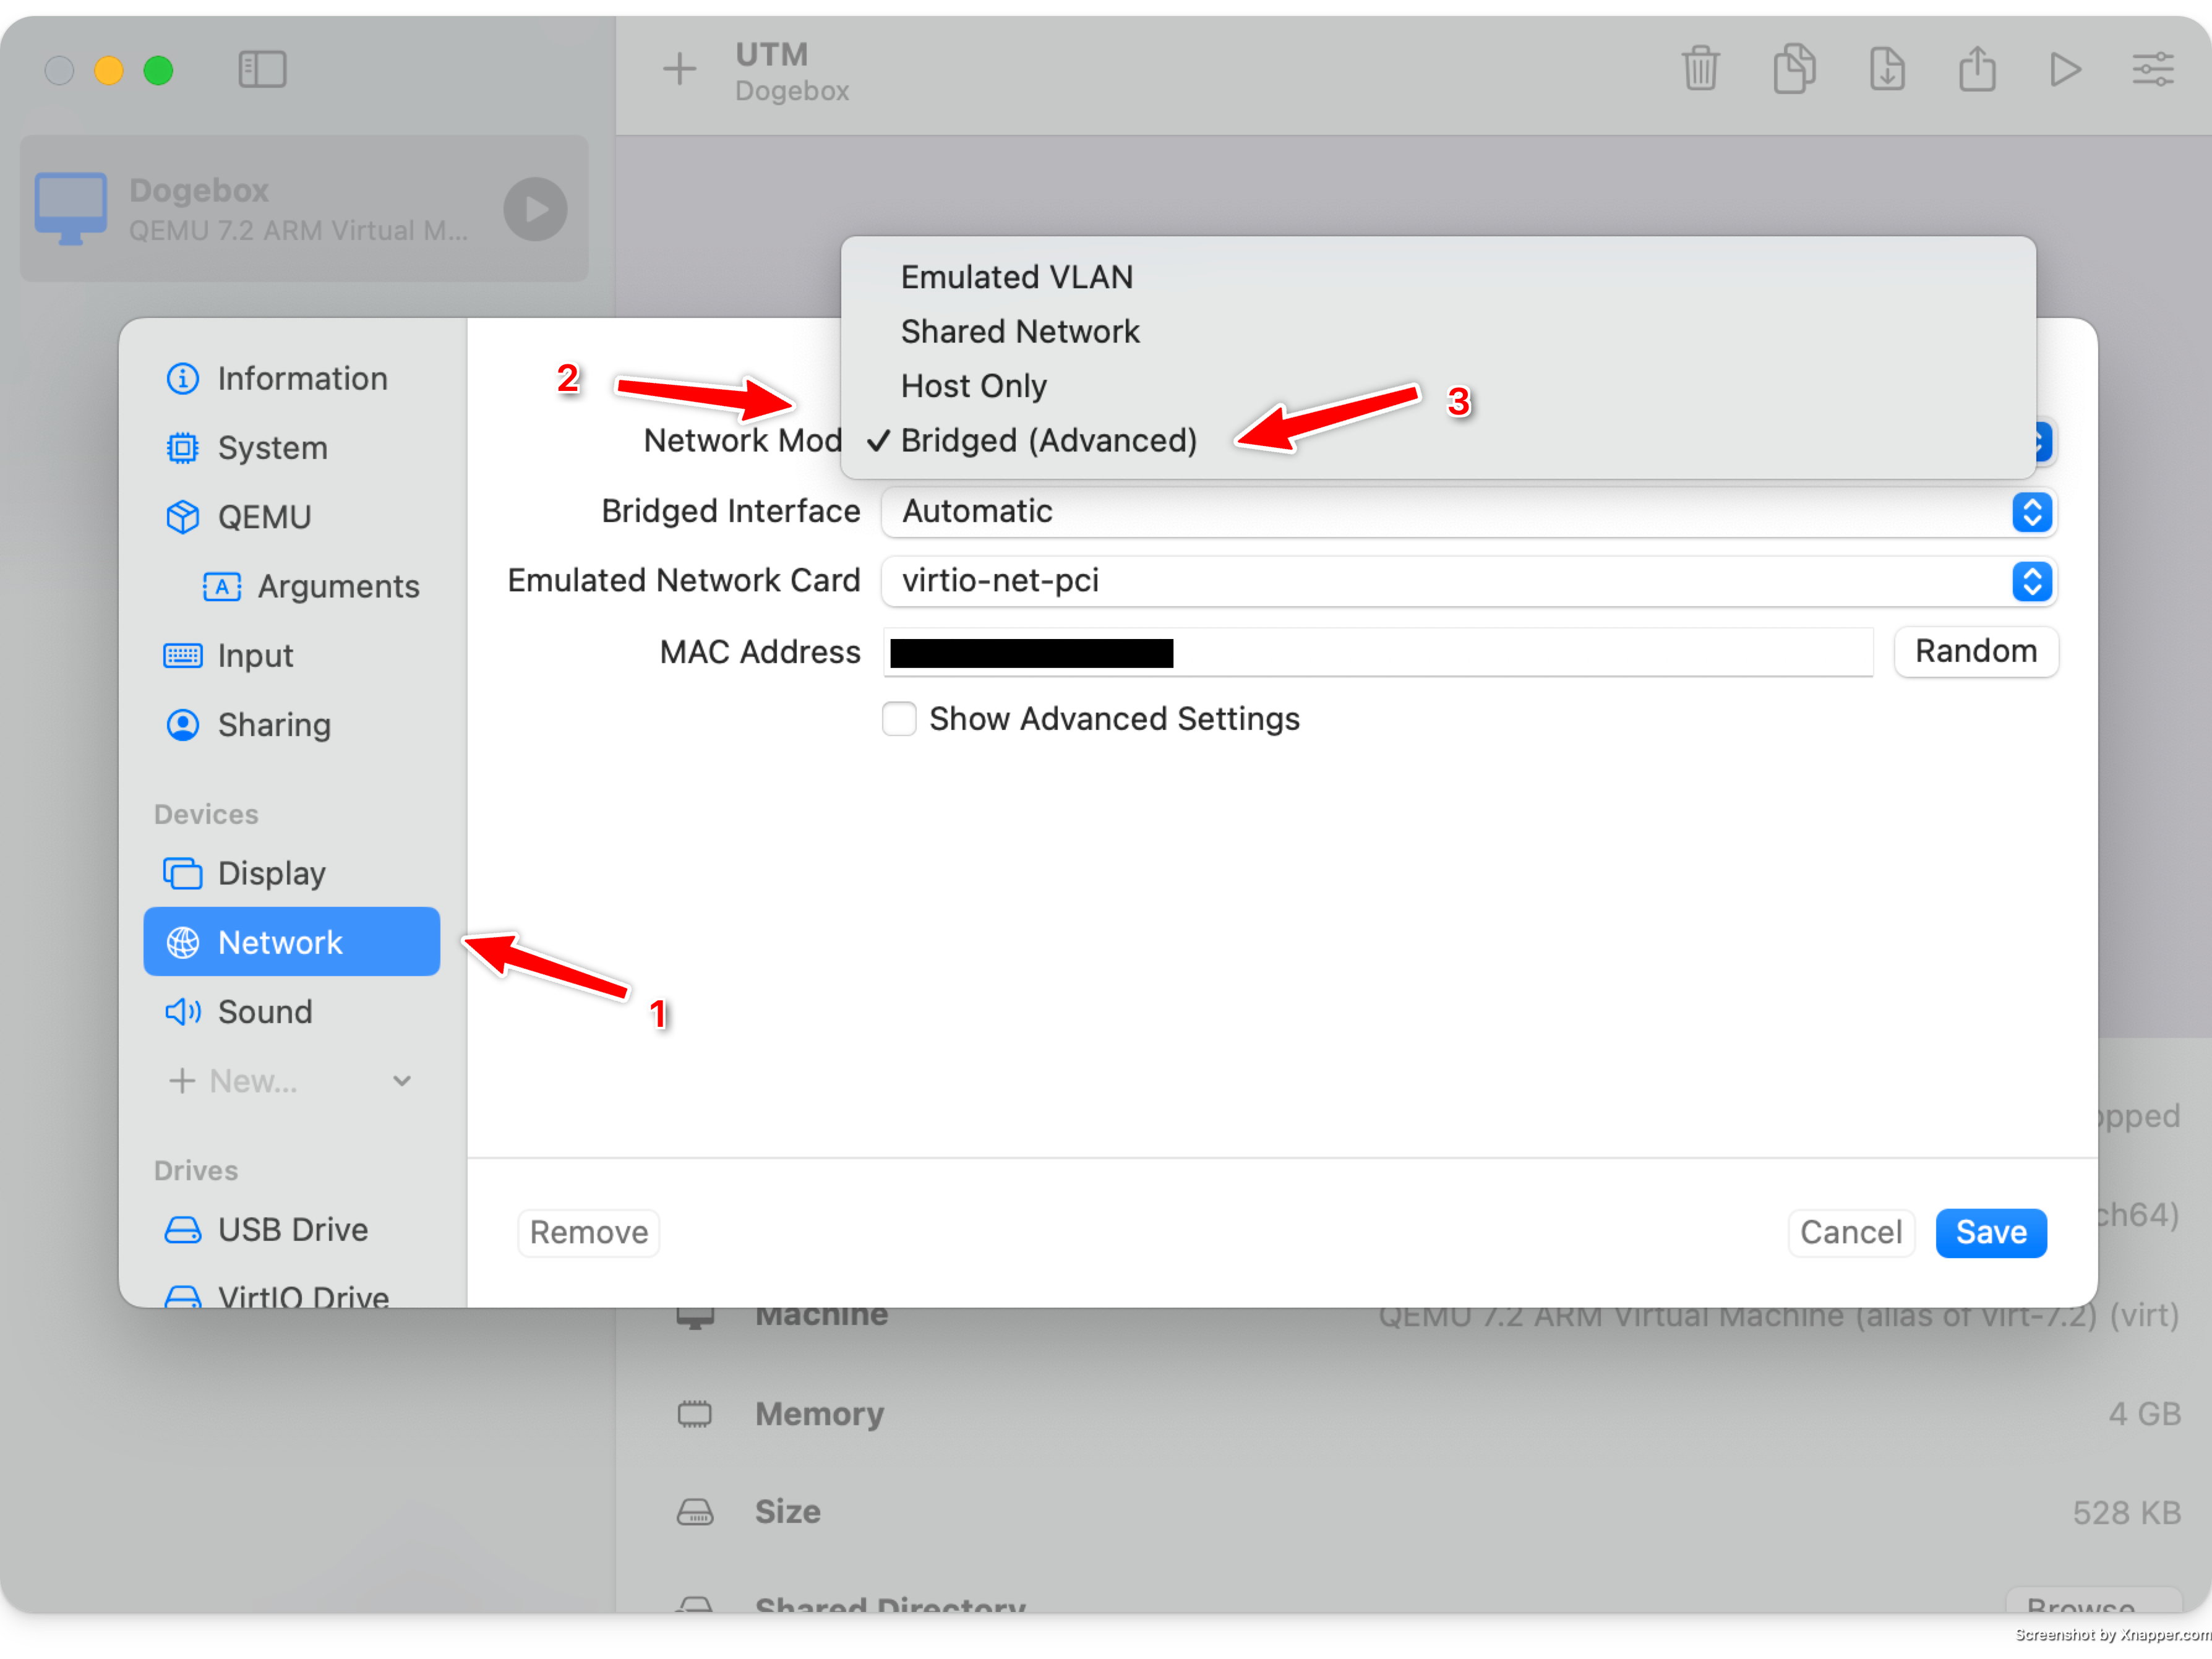
9) Configure Bridged networking
- Select
Networkon the lefthand side. - Change
Network ModetoBridged (Advanced)
10) Add serial monitor interface (optional)
- Click on
New...in theDevicessection on the lefthand side. - Select
Serialfrom the drop down menu. - Click the new
Serialentry in theDevicessection. - Make sure the
Modeis set toBuilt-in Terminal
When starting up the virtual machine, there will be a window with log messages and a login prompt once the machine is done booting.
11) Save & Launch

Configuring
Once you have booted your VM, please continue with the installation guide.